How to use FOSSology actually? The main goal is about clarifying incorrect scanner results or incomplete licensing statements. Moreover, copyright and ECC statements require corrections which must applied as well, because the scanners may find false positives.
Basic Workflow
To start with the clearing. The open source package must be uploaded and scanned for licenses, copyrights and ECC.

Figure 1: Select Upload - From File to see this
All the uploaded and scanned file packages are listed in the Browse tab. In this tab, below each of the file names, a drop-down menu is provided to select an action with respect to the associated file.
Initial Steps
In order to start the clearing workflow, perform the following steps to open the clearing window.
- Navigate to the required file and click the drop-down menu below the file.
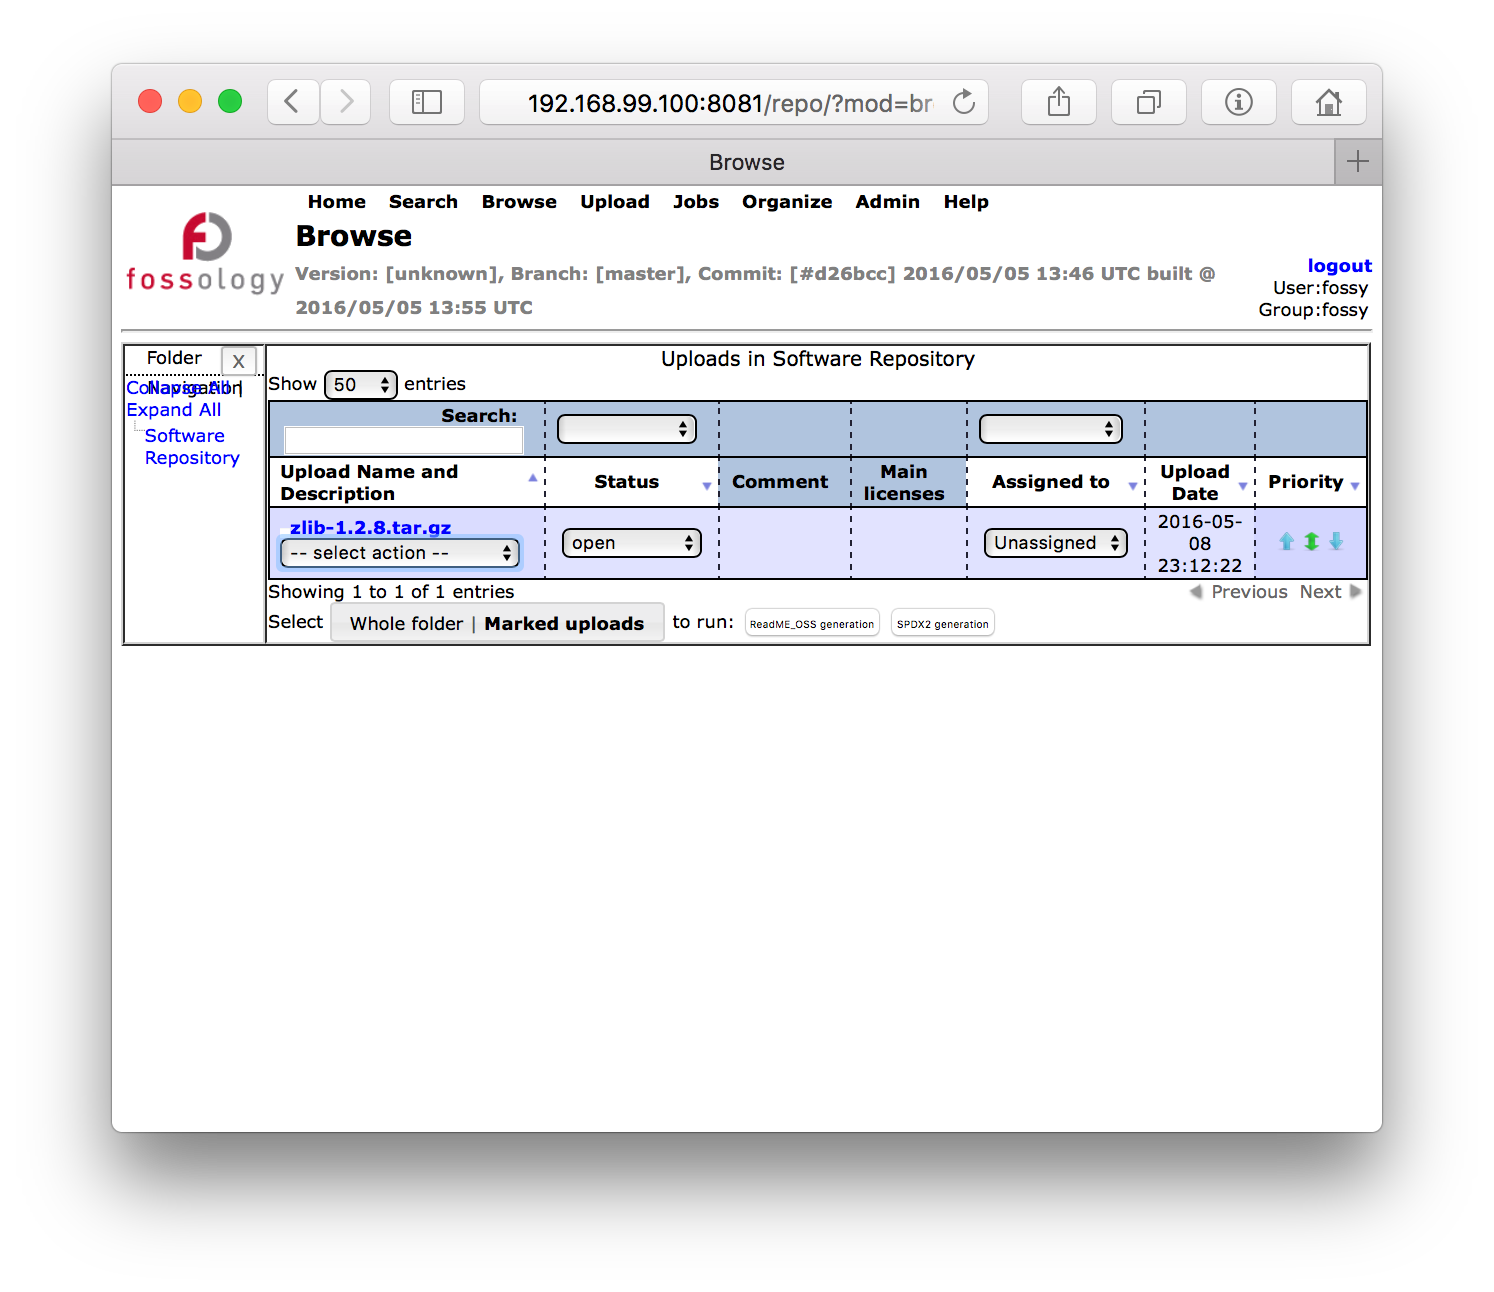
Figure 2: The file packages displayed in the Browse tab
Select the “License” option. The license clearing window appears as shown in Figure 2. The license clearing window includes a code window, a license display table and license clearing operations.
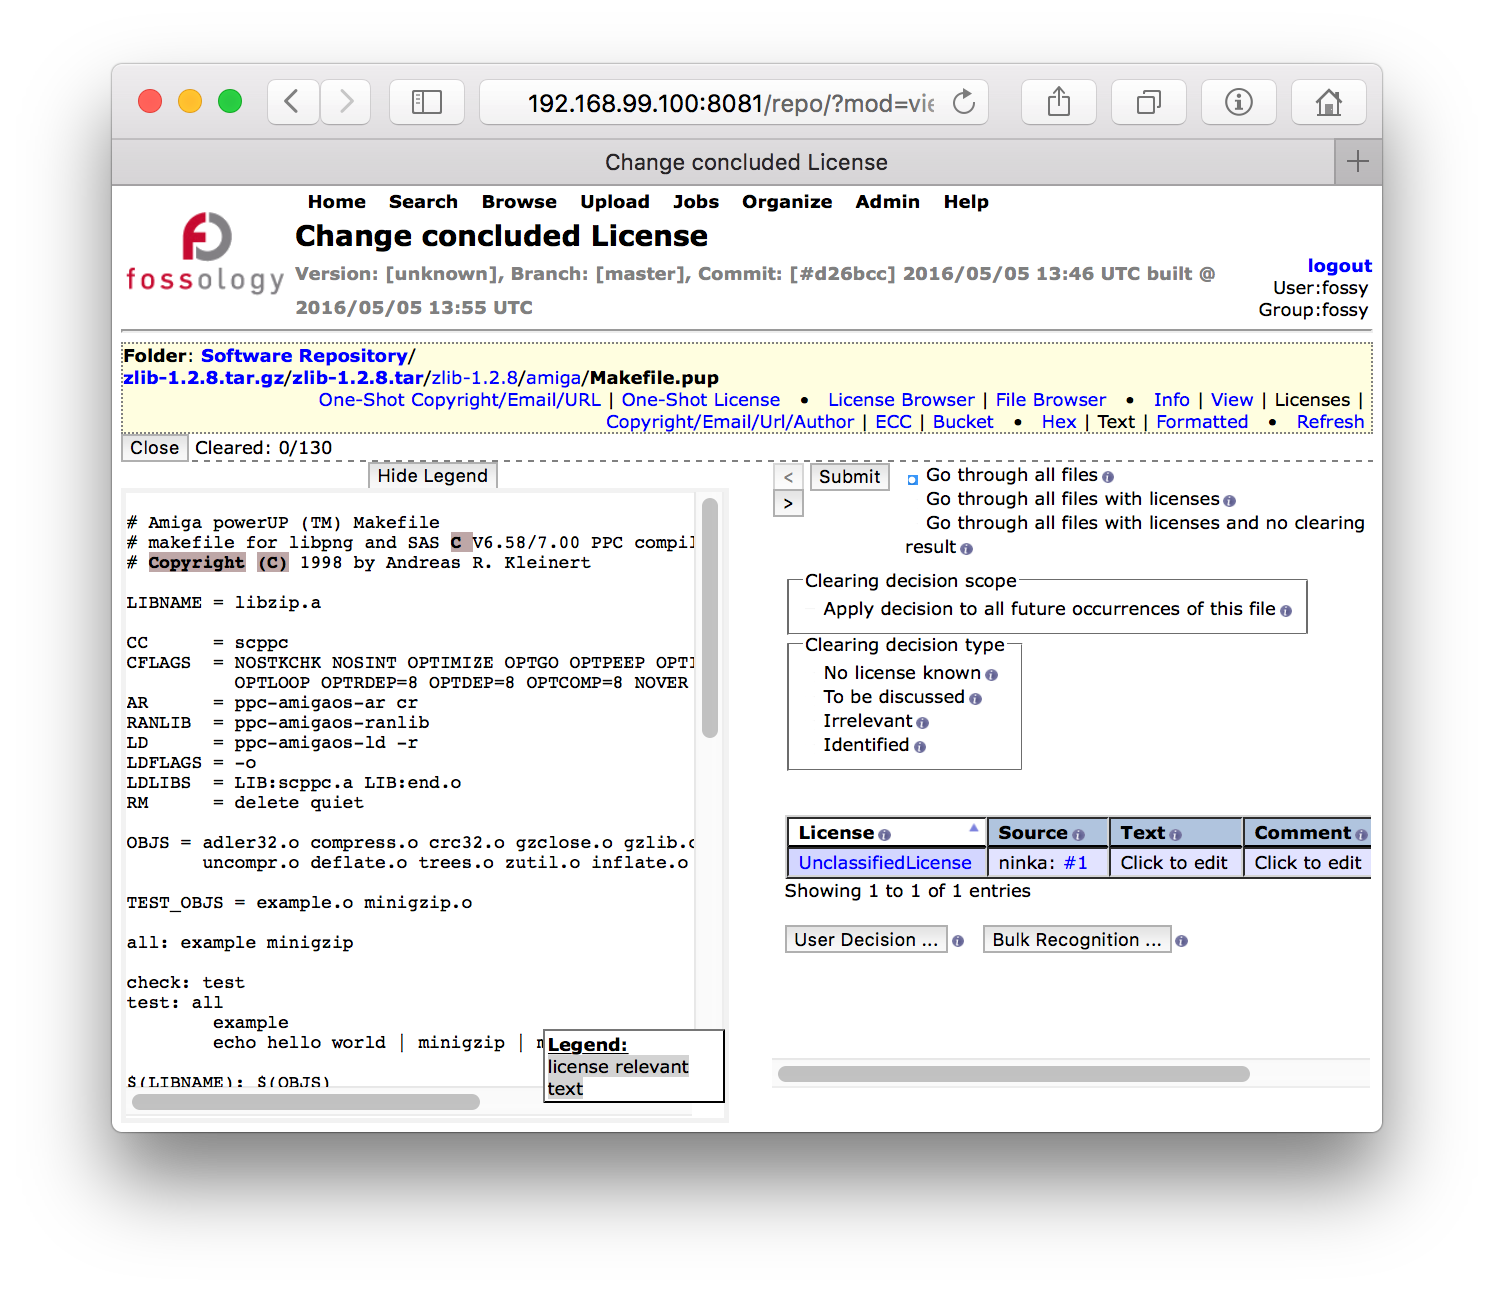
Figure 3: License clearing window
Identifying Licenses
The Fossology scan searches for one or more licenses in the file of an upload and displays the license findings in a table. You can add a comment or a text description beside each of the licenses in the license display table.
If the scanner finding matches the clearing requirement, you can directly conclude on the license to the “identified” state. Then, click Submit or the Next / Prev arrow to save the conclusion. In Fossology terminology, a clearing decision has been created.
If the scanner finding does not match the license clearing requirement, remove the license finding and add the required license.
Removing licenses found by the scanner
Certain licenses might not be applicable in the context of the scanned source. In such cases, you can remove unnecessary licenses listed in the table.
To remove a license, click the 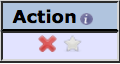 icon in the Action column of the license display table. The Fossology application will preserve scanner results and mark them as deleted, not delete them from the system.
Note: Deleting a license changes the background color of that row in the table to pink color and the delete icon will be replaced with the plus icon, as shown in Figure 3. You can add the same license back into the table by clicking the plus icon.

Figure 4: Removing a license
User Decision to add license to a file
Using User Decision, you can add licenses to a file that were not found or identified during scanning.
To add an existing license from the database, perform the following steps:
Click User Decision. This expands a hidden window containing a list of licenses saved in the database, as shown in Figure 4. The licenses with names that precede with “*” are added by the clearing specialists and those without “*” are the licenses available in the Fossology database originally.
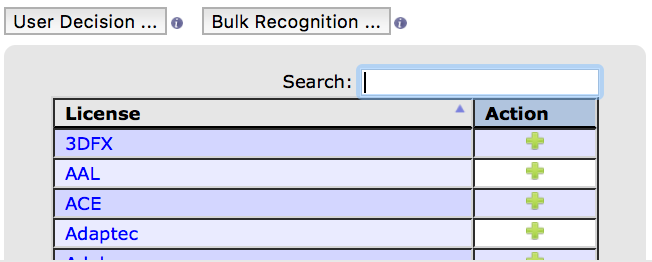
Figure 5: User Decision window
Click the plus icon to add the required license. The selected license appears in the license display table along with the list of license findings.
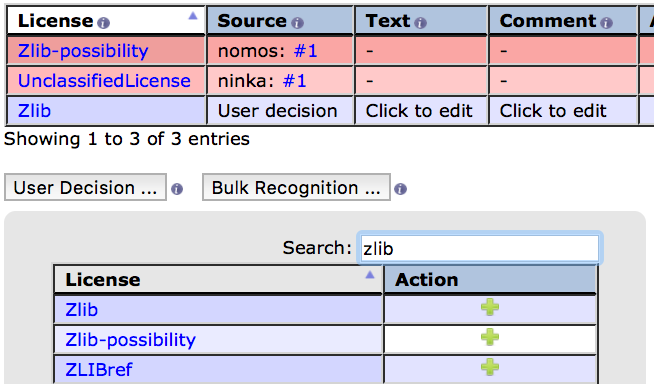
Figure 6: License display table containing the licenses added from User Decision
Identifying the main license
Generally, an open source component consists of one or more main licenses (a.k.a. “global license”). If a license identified in a file is found to be the main license of the
component, click on the star icon provided next to the remove license action icon in the license display table. This is required to identify and distinguish the main license from other licenses. When clicking the icon, it will be highlighted in yellow color (see Figure 5) and all the corresponding findings of the main license in the source code will be recognized with the main license tag.
Clicking the icon again removes the main license selection.
Bulk Recognition
Bulk recognition is a feature to perform a text phrase scan to identify files with similar license contents that are recurring across multiple files in a source code. This feature significantly reduces the license clearing efforts by avoiding repetition of similar action(s) across multiple files instead of browsing through all the files containing similar text fragments.
The license clearing specialist can identify the number of occurrences or findings of a particular license in the source code with the help of a scanner count that is displayed in the scan summary page. With this result, the user can decide upon making bulk identification for the license or not.
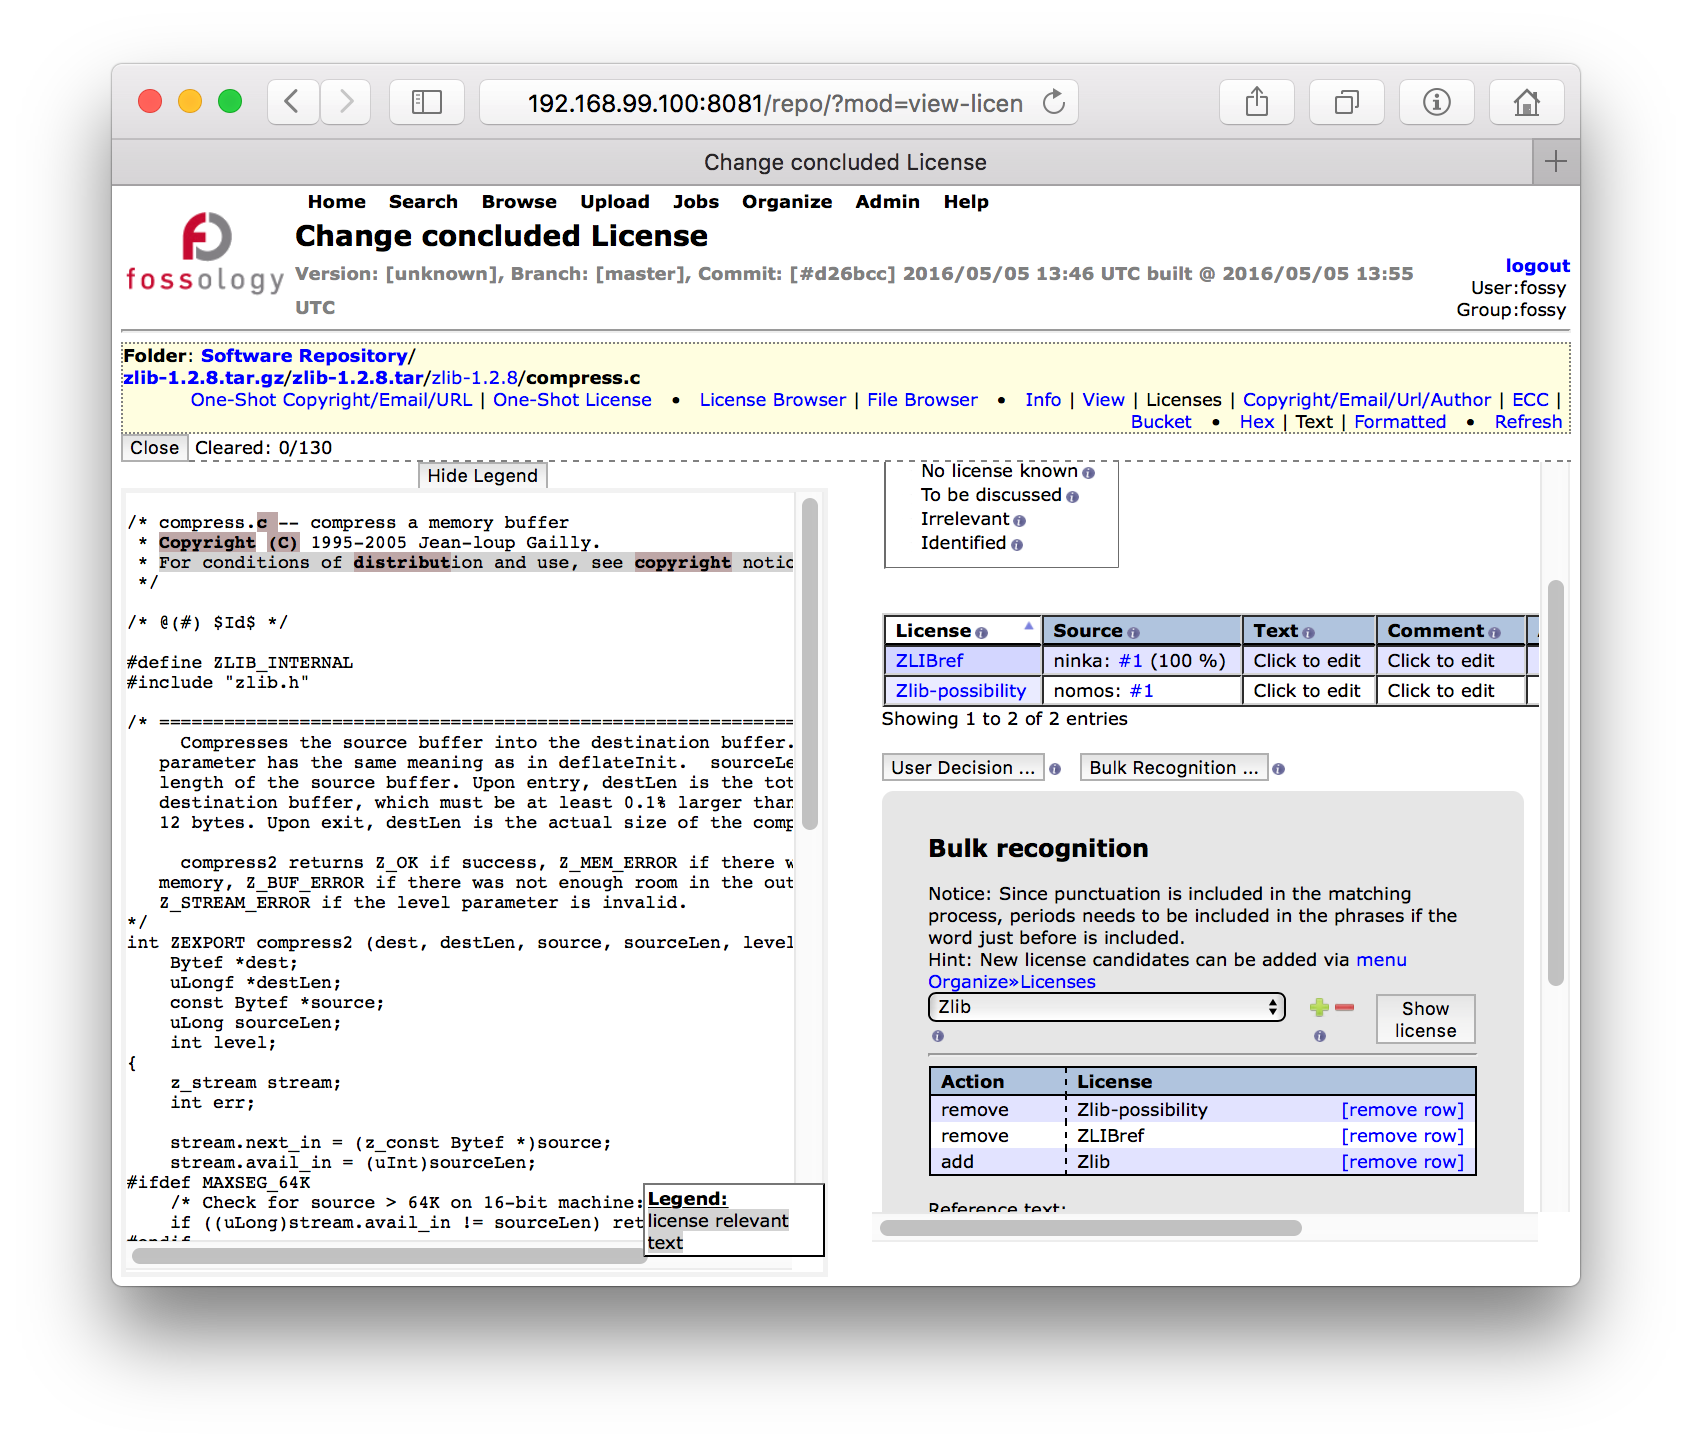
Figure 7: Bulk Recognition (lower right) with steps marked to perform bulk identification: Removing zlib-possibility and zlib-ref and adding zlib.
Follow the steps given below to perform bulk recognition.
-
Click Bulk Recognition. The Bulk recognition window expands.
-
Copy the license text content from the source code and paste it in the Reference text text area. To remove extra white spaces and to ignore the comment symbols in the text fragment during scanning, click Clean text.
-
Select the license from the drop-down list that correlates to the license text content. To view detailed description about the license, click Show license.
-
Choose the action from the drop-down list to add or remove the licenses to be scanned.
-
Selecting the plus icon to add a license – this adds the selected license in files where the license text content is found. This will appear in the license display table along with other licenses, if any.
-
Selecting the minus icon to remove a license – this option removes the selected license from all the files containing the same license text content.
-
-
Choose between the options “Scan whole upload” and “Scan only current folder” to search for the selected license text throughout the uploaded file or only in the current folder, respectively.
-
Click Schedule bulk scan to start bulk scanning.
-
Note: Bulk History displays details about the license and its text content for which bulk scanning was done.
Creating a Clearing Decision
Clearing decision scope: Checking “Apply decision to all future occurrences of this file on the entire server” will apply the decision type chosen for all the future occurrences of the current file based on the hash value computed.
Note: Use this option carefully as the decision applied impacts the file upload of all the other users. Basically, this should not be used in a multi-group setup. In other organizations, the setup might be a bit simple.
Clearing decision type: To generate a clearing result, there are four decision types to choose from:
-
No license known: To indicate that the license is unknown and the license related information could not be verified (if any).
-
To be discussed: To indicate that the license has been reviewed, however, unable to decide upon clearing the file and requires discussion about the license in detail.
-
Irrelevant: To indicate that the license information available in the table or file is not a part of the deliverable and hence irrelevant for clearing (for example, build files).
-
Identified: To indicate that one or more licenses listed in the table are reviewed and identified.
After identifying the correct license, select the appropriate decision type and click Submit to save your decision. Clicking the Next / Prev arrows will also save your decision.
Adding a new license into the database
To add a license into the database, follow the procedure given below.
-
Navigate to the Organize tab at the top of the window.
-
Click License. This will open “Advice licenses” web page containing list of existing licenses and their details.
-
Click New License. This will open a new web page to add details about the new license.
-
Enter a Shortname for the new license that should conform to the SPDX licensing scheme. For more information on SPDX licensing, click here.
-
Enter Fullname.
-
Enter Reference text to provide license details.
-
Enter URL of a specific web page to provide more information on the license.
-
Enter Public note. This is optional to add license related notes.
-
Select the Risk level. Use the risk level to mark the license according to your legal evaluation of the license text.
-
Merge request, if checked, the admin will receive a request to avail the new license to users under all the groups. Otherwise, the new license will be visible only to the members of the group and to the user himself. However, it is optional and is unchecked by default.
-
Click Save. The new license details will be saved in the database and “Successfully updated” message will be displayed on the screen.
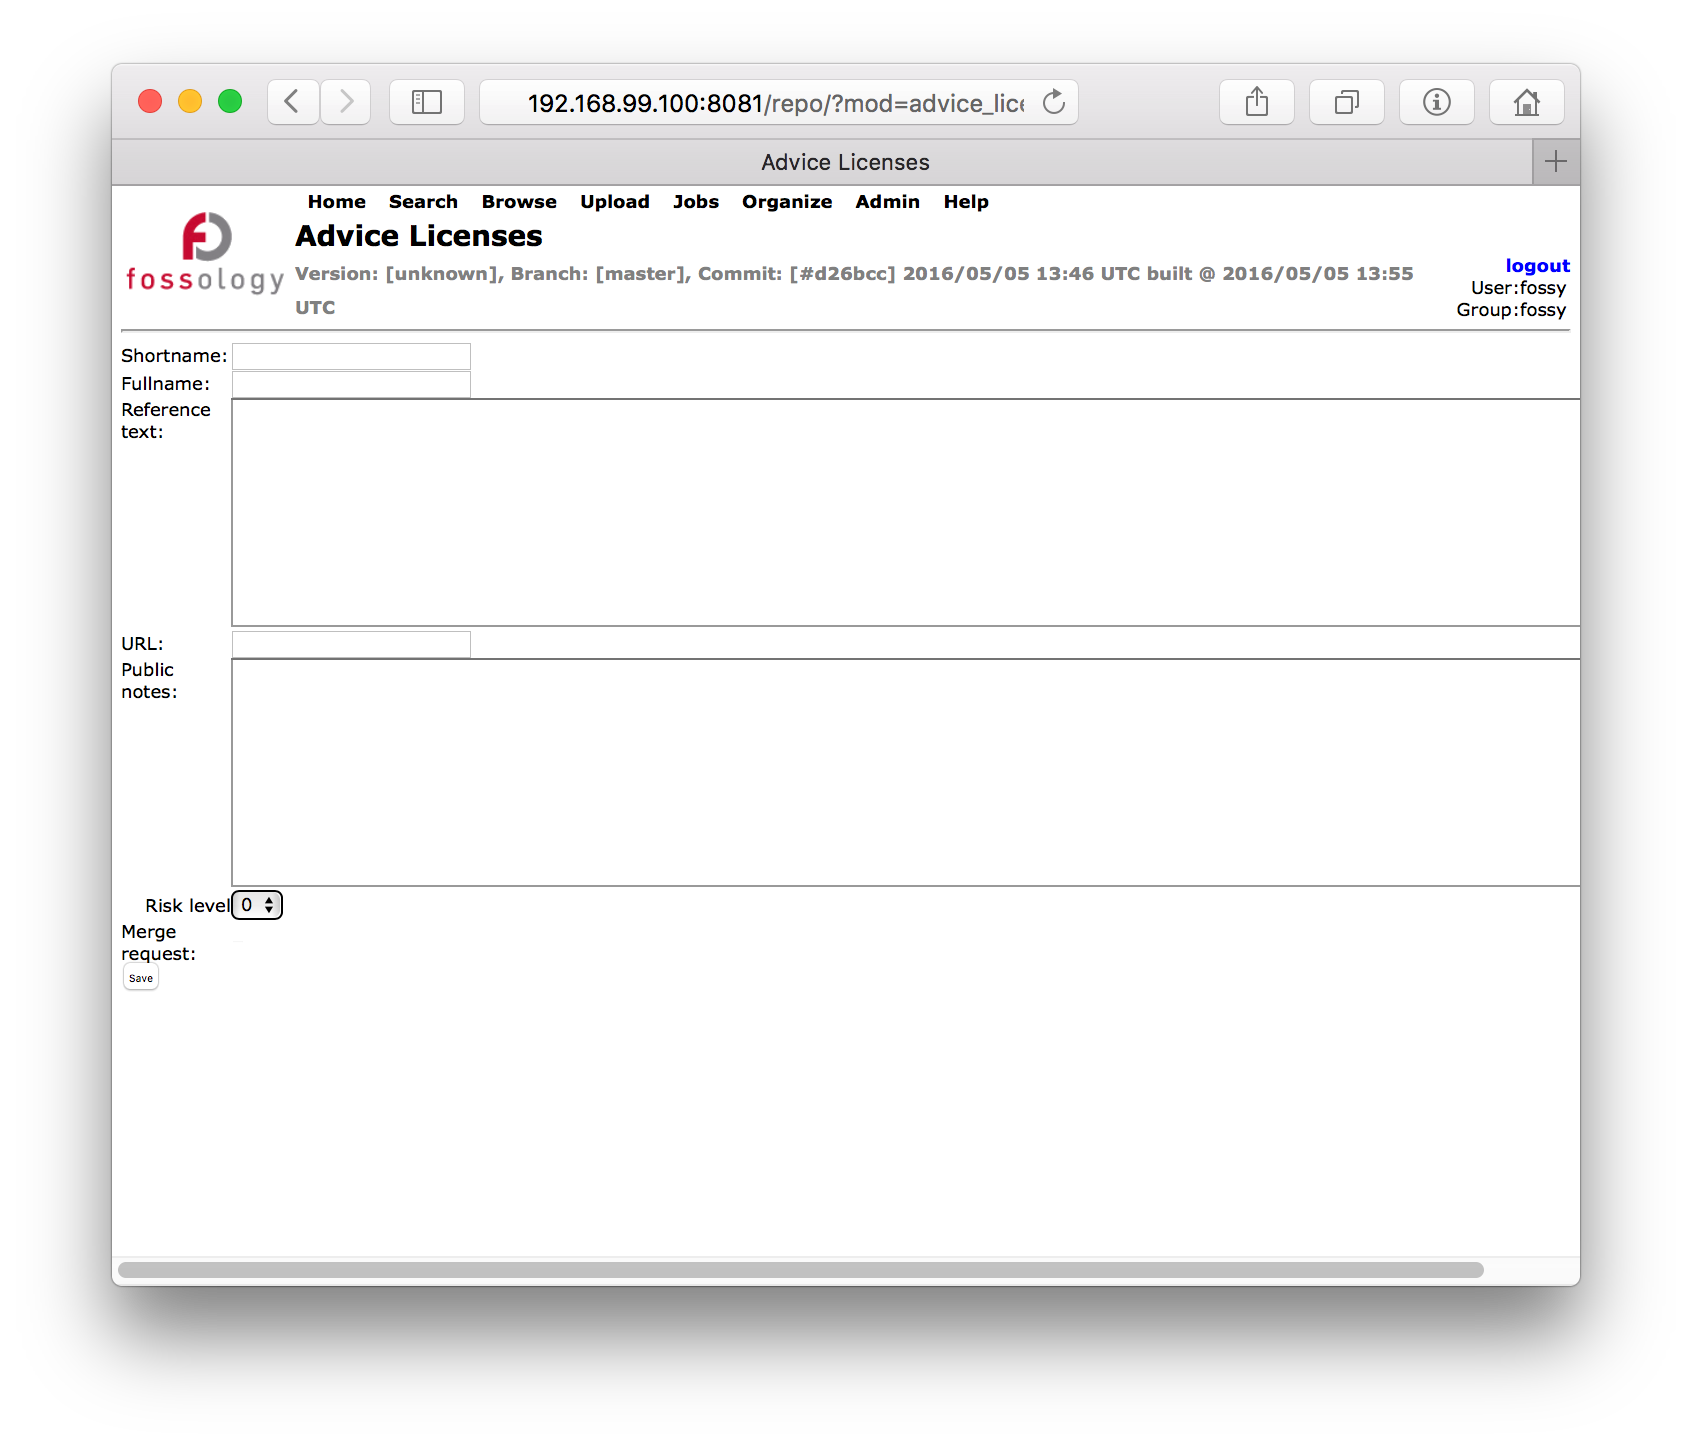
Figure 8: Adding new license details into the database
To view or edit license(s) in the database, navigate to the Organize tab and click License. All the licenses are sorted alphabetically; however, the user can click on the “Shortname” column header to change the sorting order.
Clearing Copyright Statements
Fossology scan also looks for copyrights, e-mail and URL content in the file package. To navigate to copyrights (includes email and URL) clearing web page, click on the Copyright tab in the yellow menu bar area. Or, click select the copyright option from the drop-down menu available at the uploaded package in the browse section.
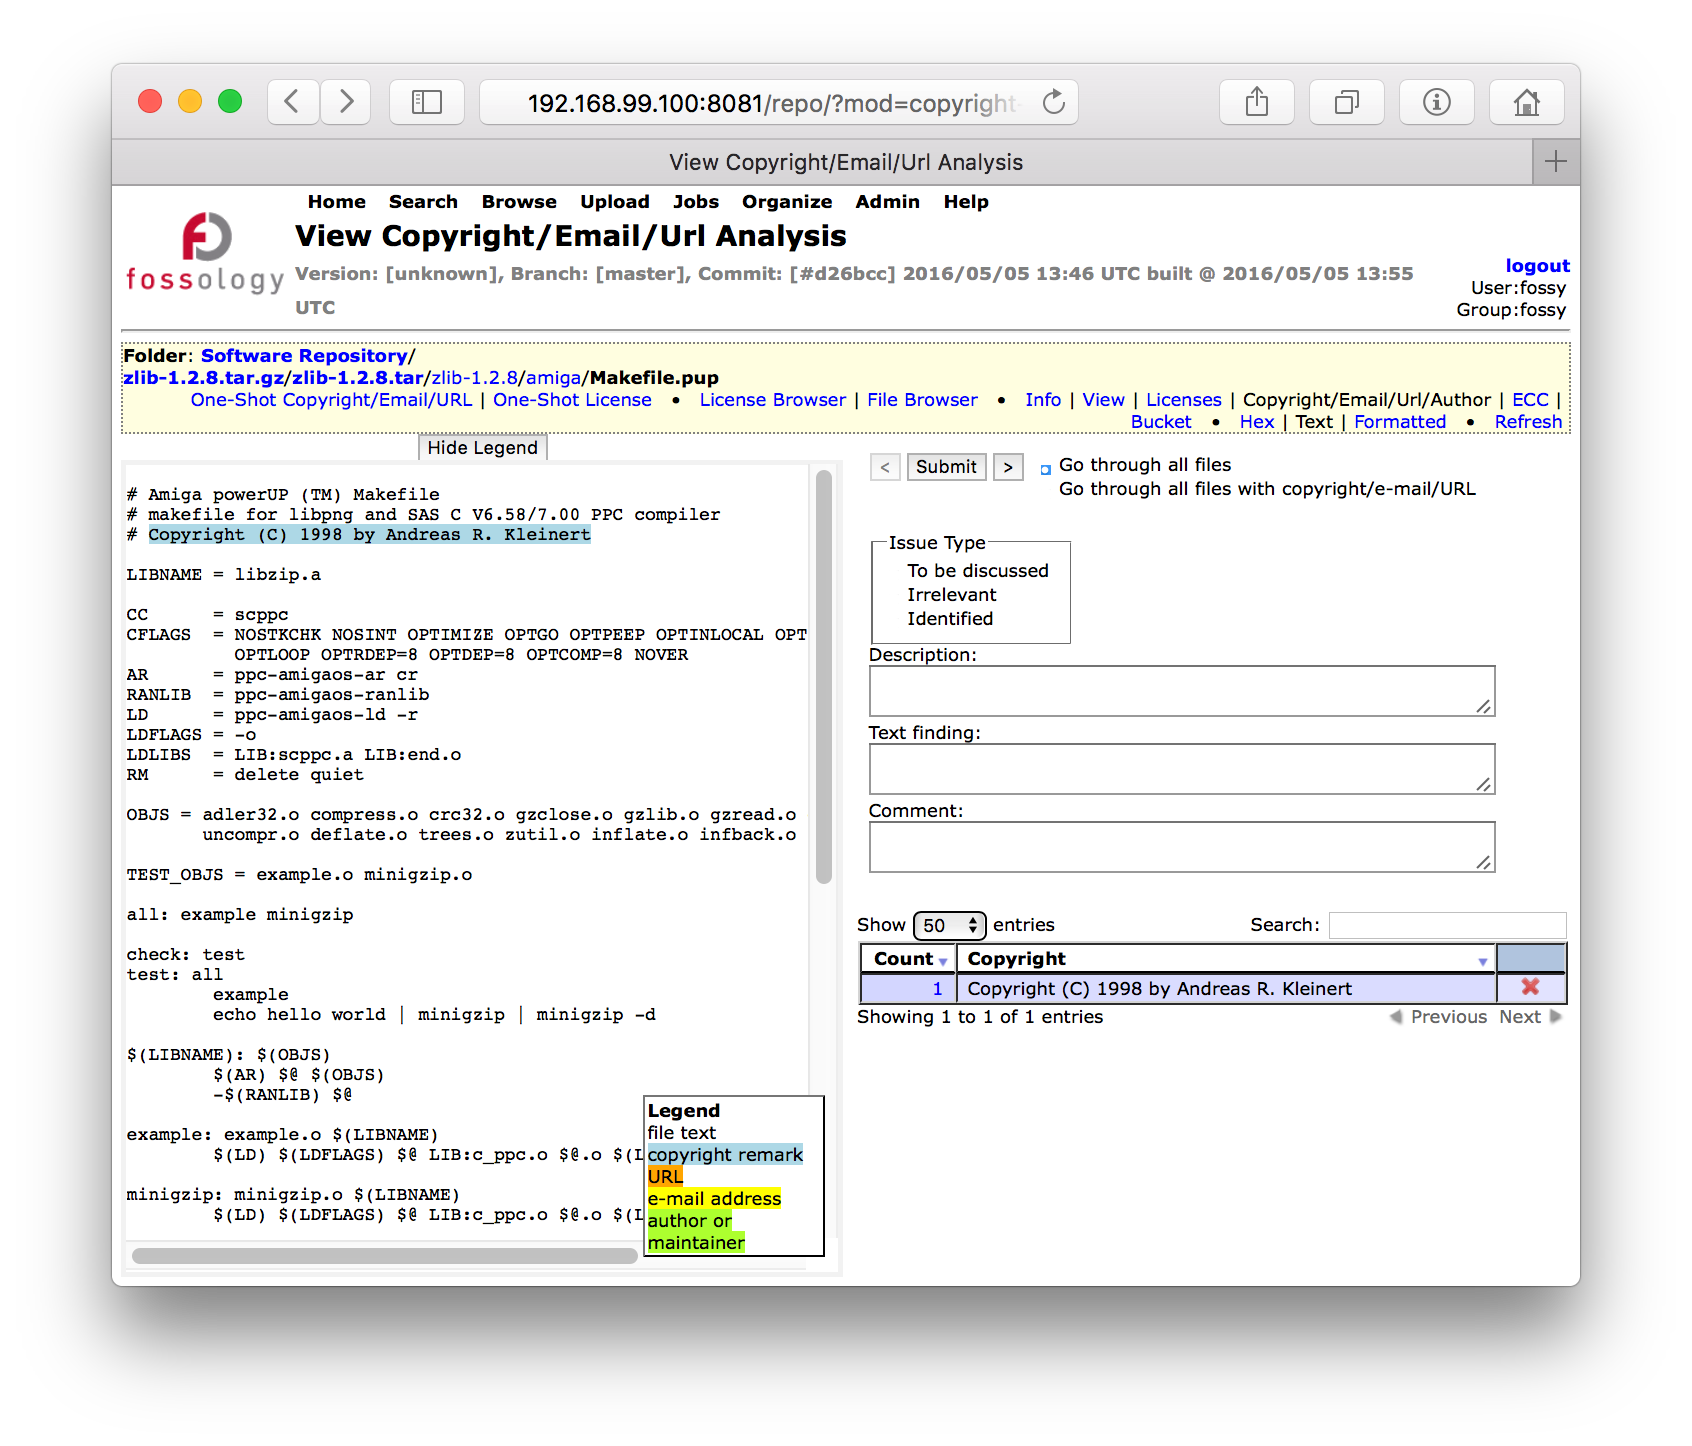
Figure 9: Copyright single file view
The copyright statements can be displayed aggregated mode by selecting the folder level from the yellow menu bar option. The identified copyrights in each file will be displayed in a table and you can add a description or a comment to it. The ‘Count’ column displays the number of the copyright instances repeated in that file. The final report generally contains all the copyrights and its information, unless it is removed.
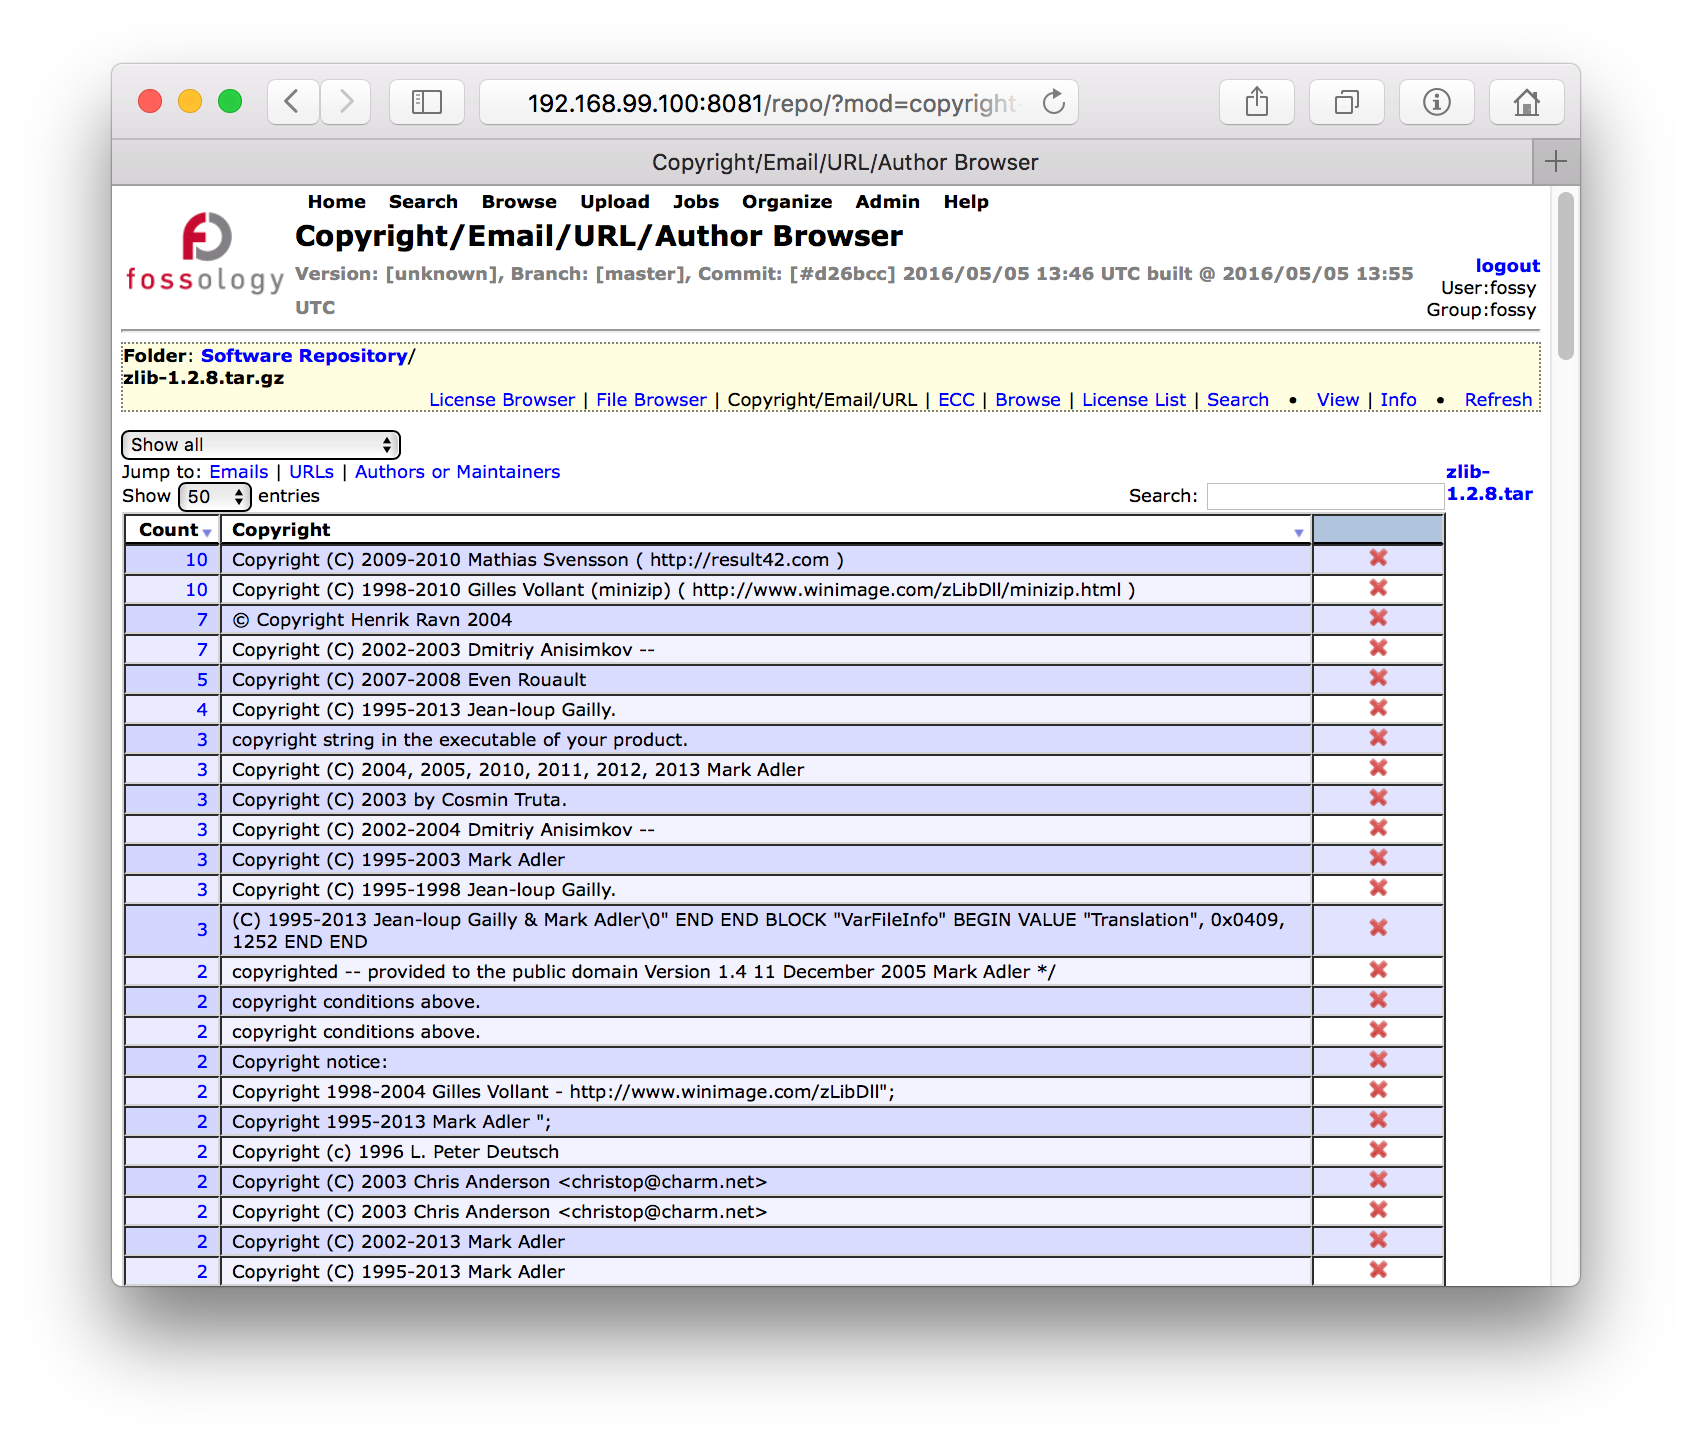
Figure 10: Aggregated copyright view in the file hierarchy
Editing copyrights
You can edit the copyright information by clicking on the required copyright finding as shown in Figure 10. Press “Enter” to save the changes.

Figure 11: Editing a copyright
Removing copyrights
If the scanned copyright information is not valid, then click the red cross icon to remove it, as shown in Figure 10.
Note: When a copyright is deleted, you can undo the changes until you remain in the same web page; once the page is refreshed or navigated to another web page, you will not be able to find the undo option.
Adding a new copyright
You can add new copyright text findings that are relevant or supporting in the context of a copyright. You can add the copyright content in the Text finding text box and click Submit to save the new text findings. The changes will be captured in the reporting.
Copyright and ECC Single File Handling
In general, you can ignore the single file view for copyright since different copyright issues or remarks about copyrights are not distinguished. The single file view is shown in Figure 8.
Single file view is not specific to copyrights as they exist because the ECC scanner uses the same interface. For ECC findings, the issue types are useful information to explain the ECC issues. The issue types indicate the decision taken with respect to the copyright findings by the clearing experts to generate a result in the report.
The three different issue types are:
- Identified: To indicate that the new text finding information of a copyright is identified. This will be presented in the final report.
- Irrelevant: To indicate that a file is irrelevant. This information will not be present in the report.
- To be Discussed: To indicate that the file requires further discussion. This will not be present in the final report.
Click Submit to save the chosen decision type.
Aggregated Copyrights View
Clearing copyrights file by file becomes tedious if the file package contains a large number of files. To make copyright clearing process easy, you can view a consolidated list of all the copyrights/email/URL in the source package by clicking file package name displayed at the top left corner of the web page as shown in Figure 9. The page displays a list of copyrights and a count of its copyright instance repeated across the file package along with the red cross icon to remove the copyright from the list.
You can edit or remove redundant copyrights in the list instead of browsing through the copyright findings in each file. Clicking on the count item displays all the file names that contain the same copyright information. You can open the file and mark the copyright as “to be discussed” or “irrelevant” or “as identified” to generate a result in the report. For example: clicking on the count item of the second copyright finding, displays all the file names in which the same copyright information is found in multiple files (shown in Figure 12).
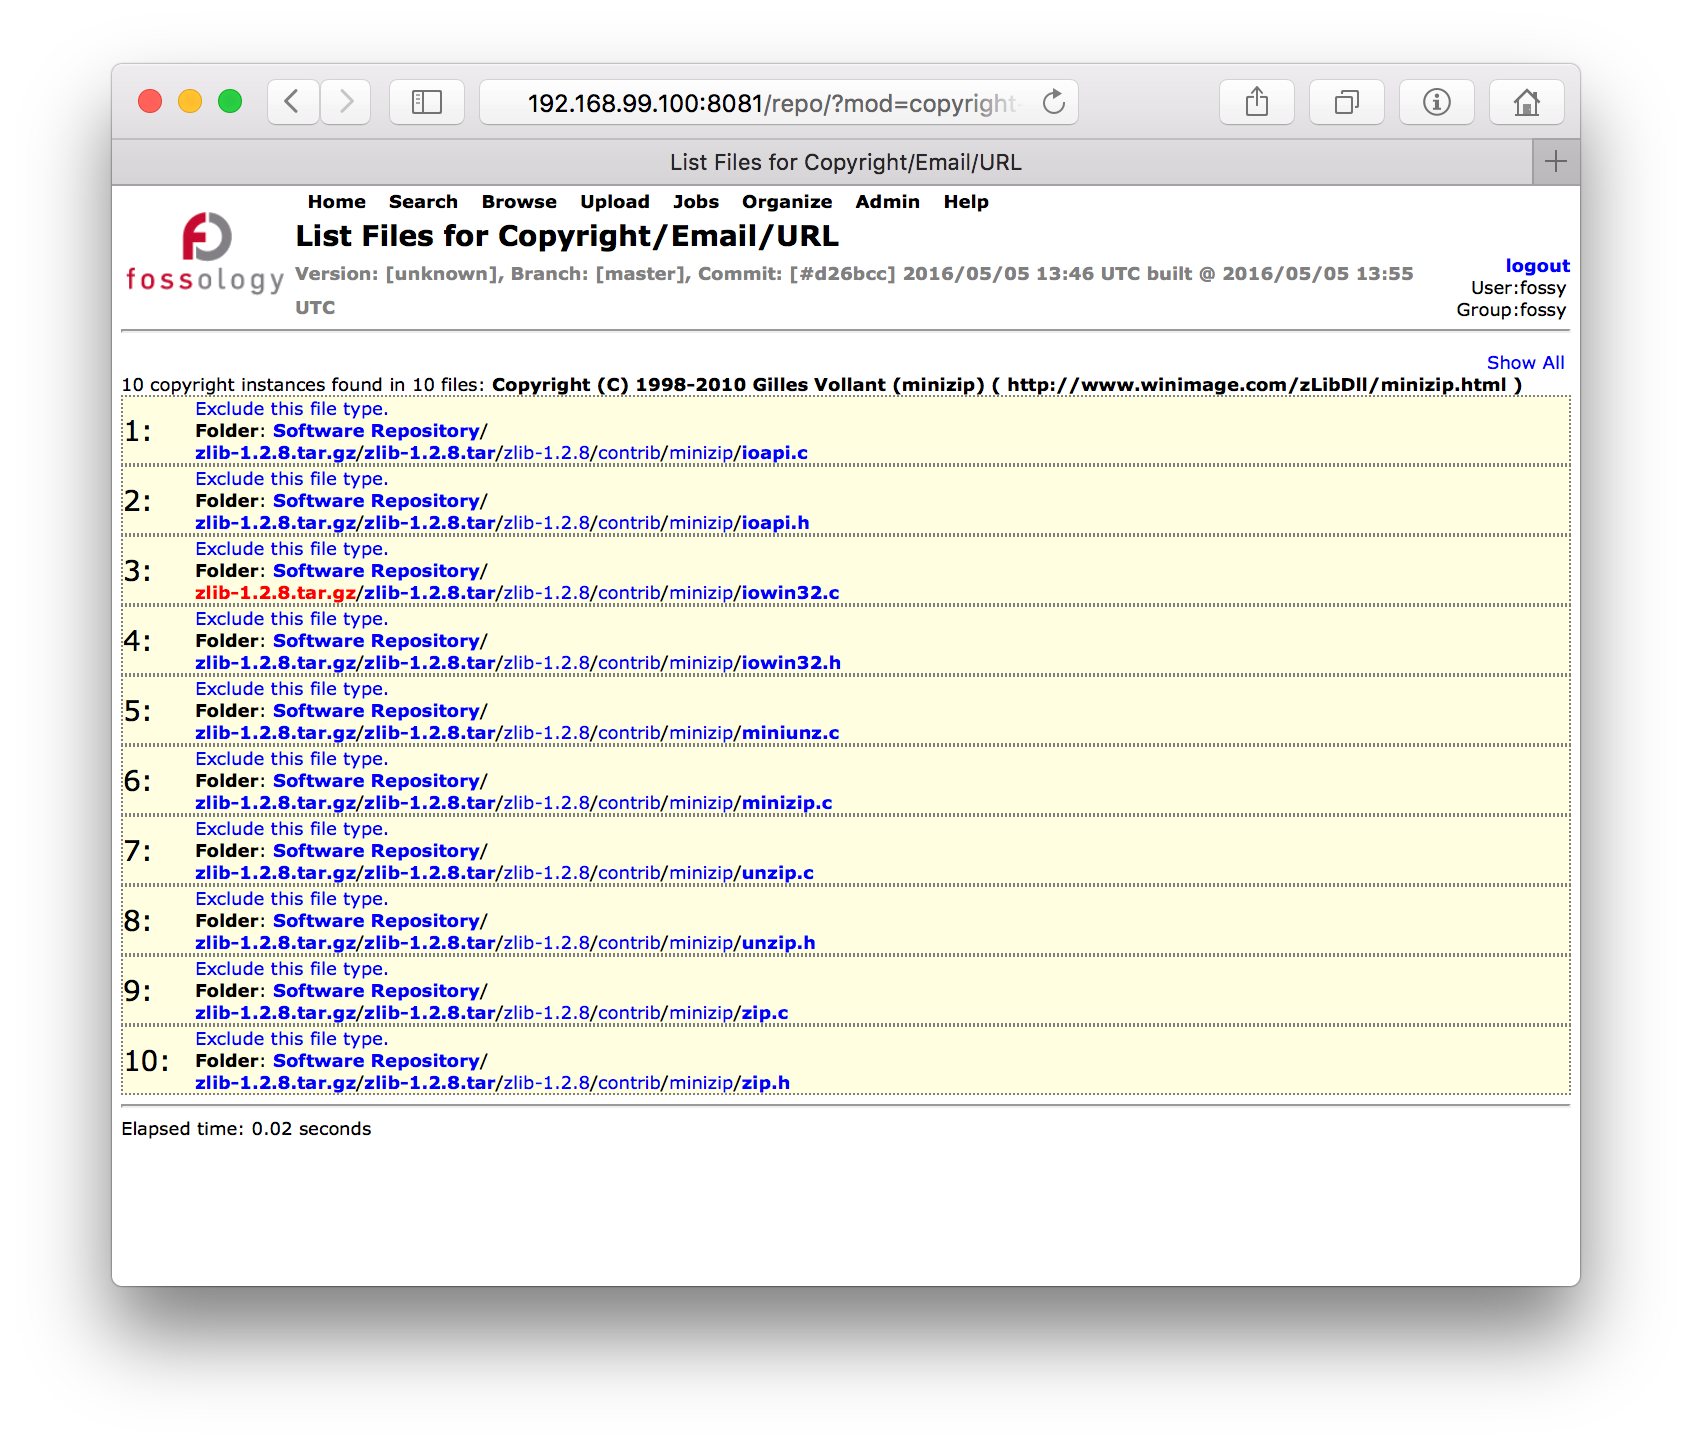
Figure 12: Occurrences of "Copyright (c) 1998-2010 Gilles Vollant (minizip) (http://www.winimage.com/z1ibDll/minizip.html)"
Clearing of ECC Statements
Fossology scan looks for ECC text findings in a file package. You can navigate between files in the package or have a consolidated list of ECC findings to clear them. To open the ECC page, click on the Copyright/Email/URL tab, this displays the ECC tabs in the menu bar. Navigate to clearing of the ECC section.
Issue Types
The issue types, indicates the decision taken with respect to a ECC finding by the clearing experts to generate a result in the report. The three different issue types are:
- Identified: To indicate that the ECC scanner findings are identified and will be presented in the final report.
- Irrelevant: To indicate that a ECC finding is irrelevant. This information will not be present in the report.
- To be discussed: To indicate that the file requires further discussion. This information will not be present in the final report.
Adding a new ECC Text Finding
You can add new text findings related to an ECC statements. To perform this action, copy the text finding from the code window, paste it in the Text finding text box (highlighted blue in color in Figure 8) and click Submit to save the new text finding. This information will be presented in the report only if it is denoted as “identified”.
Removing an ECC Text Finding
The ECC findings found in each file during the Fossology scan are highlighted in the code window. To remove a scanner finding, you need to navigate to a page that displays a consolidated list of all the ECC findings in the entire package. Click on the unzipped version of the file package name provided at the top left corner of the window (shown in Figure 9).
Click the red cross icon to remove an irrelevant or an unnecessary finding.
Note: You will not be able to undo the changes once the page is refreshed.
You can also display ECC findings list directly by clicking the ECC tab listing page that is highlighted in Figure 15 and vice versa.
If an ECC is found to be important and must be in the report, then it should be denoted as “identified” and has to be saved. To do this, navigate to the specific file and choose the issue type as “identified” and click Submit.
Each item in the ‘Count’ column (in Figure 15), represents the number of times the ECC text instance has been found in the entire file package. Upon clicking the count item, a list of file names is displayed in which the text finding was found.
Definiton of Done
When your are done with the clearing (generally, depends on the definition of the clearing process of your organization), you can consider the following checks:
-
All licenses are checked?
-
All copyrights are checked?
-
ECC information is checked ?
-
Main license is selected?
-
Reviewed files for irrelevant sections?
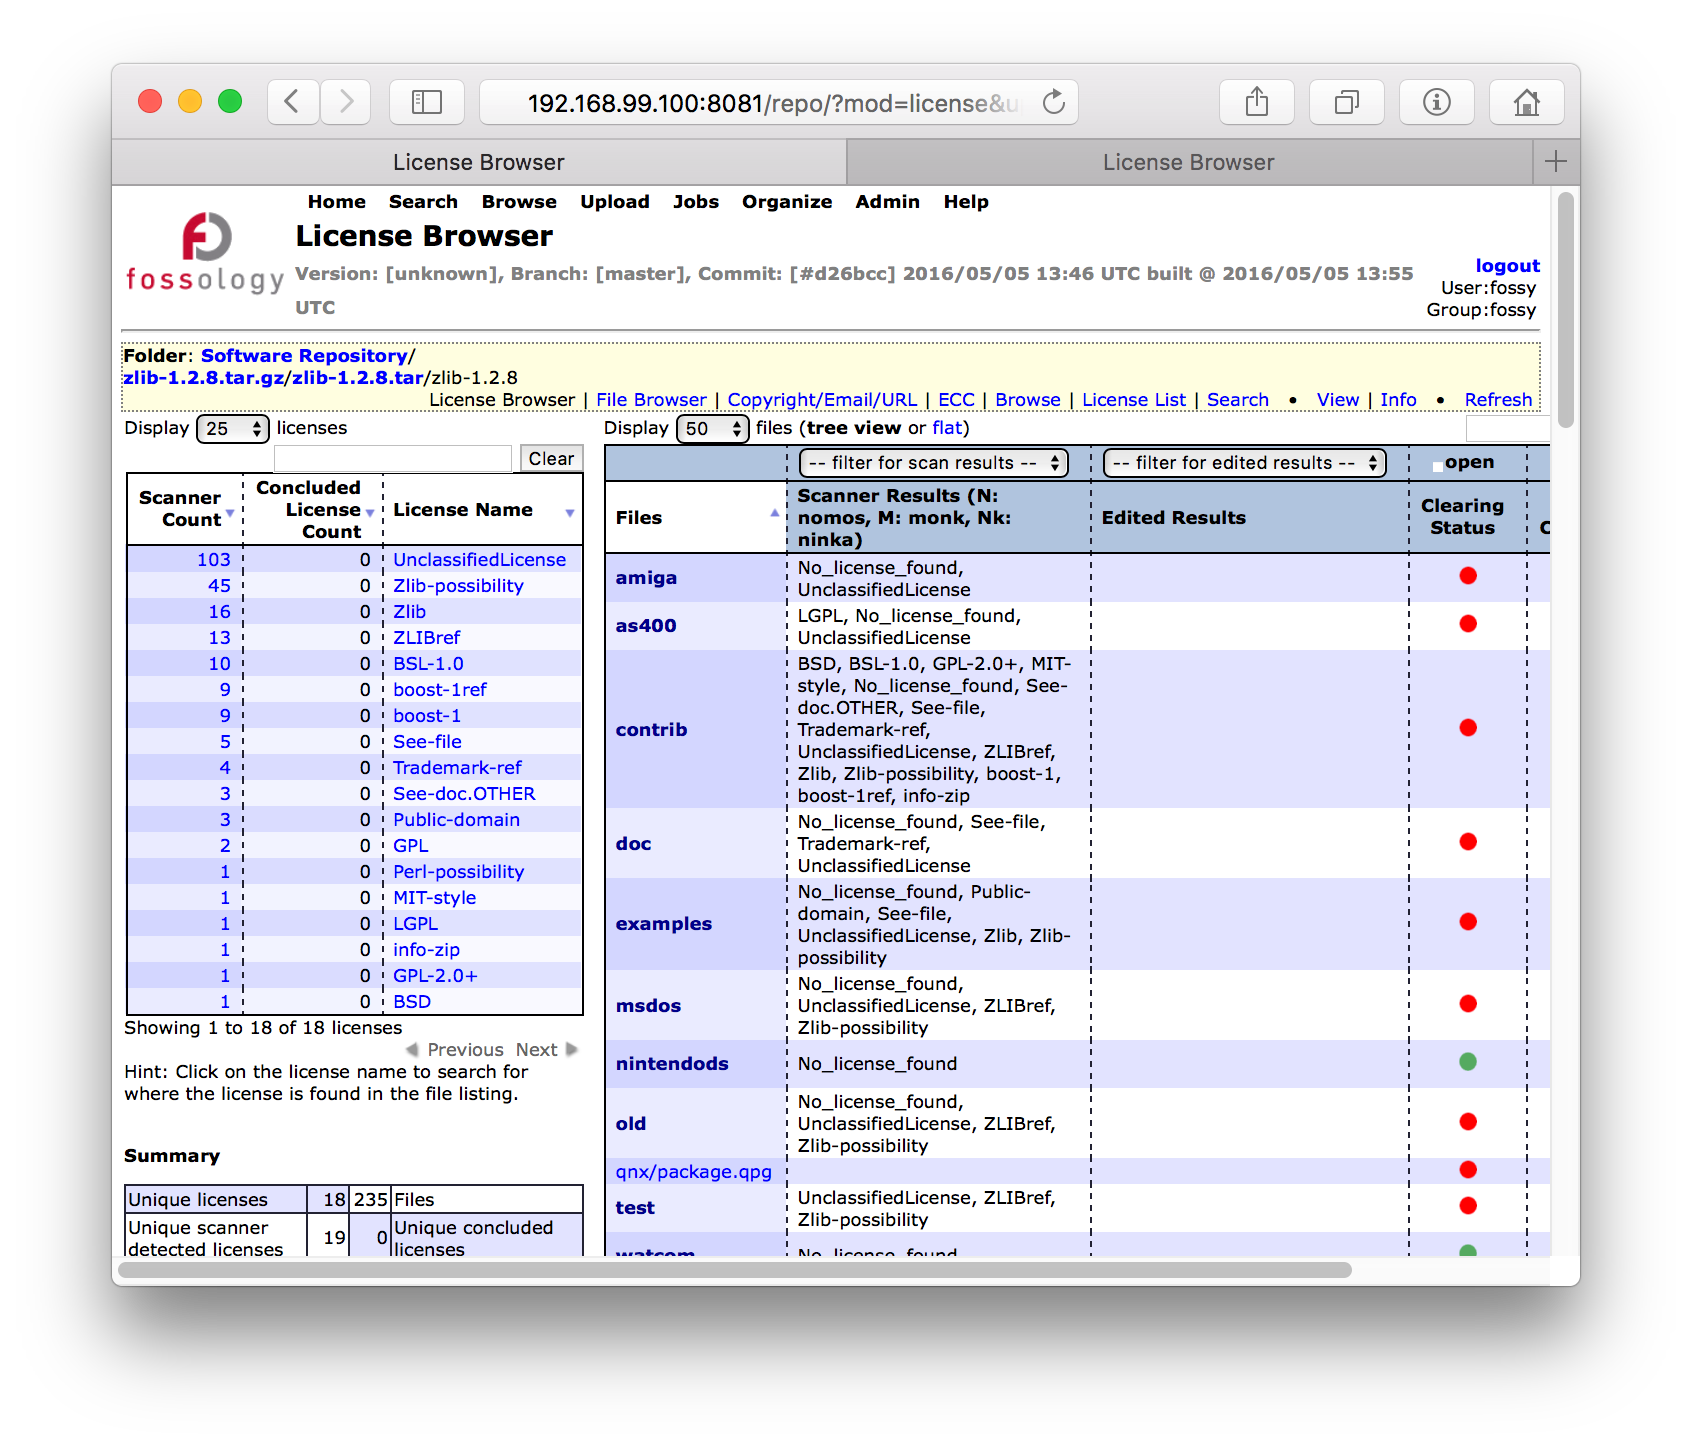
The License Browser helps to get an overview by indicating the applied clearing decisions (green dots) and the open files (red dots). You can see the license browser aggregated view by clicking on the topmost path element of the upload in the yellow mnue bar area. Basically, it is about turning the red dots into green ones.